Showing posts with label tutorial. Show all posts

Favorite Fishtail and Waterfall Braid tutorials

 photo fishtailandwaterfallbraids-1_zpsad03b48b.jpg
images via pinterest

I have collected my favorite Fishtail and Waterfall Braid tutorials over a bit of time for getting those beautiful pretty, romantic, sometimes simple and even sloppy undone looks! Often these Braids look far more complicated then they really are and I have found that the tutorials collected are the most easy and fun to work with while giving inspiration for future more complicated fishtail and waterfall braid fun in updo's and working in multiple sections! 

xoxo


1) the Fishtail Braid


First things first, Lauren Conrad shows us how to do the fishtail braid in a few easy steps. I found this video really the best and most easy tutorial for mastering (and beginning the "art-of") the fishtail braid! 


2) Fishtail Braid picture Tutorial


For when the video above is not enough or you like photo tutorials more in general! This beautiful tutorial explains the fishtail braid in easy to follow steps. (And yes, for that big, fat and sloppy look in the 1st picture above you can distress/tease/pull apart the fishtail braid!)

http://www.oncewed.com/diy/fishtail-braid-tutorial/

 photo fishtail-braid-wedding-hairstyles-for-long-hair-tutorial_zps82fcf2b6.png


3) Half sloppy fishtail braid

Refinery 29's slideshow shows us how to get this perfect half sloppy fishtail including how to get those sexy beach waves!

http://www.refinery29.com/3-diy-hairstyles-for-straight-hair-1/slideshow#slide-1
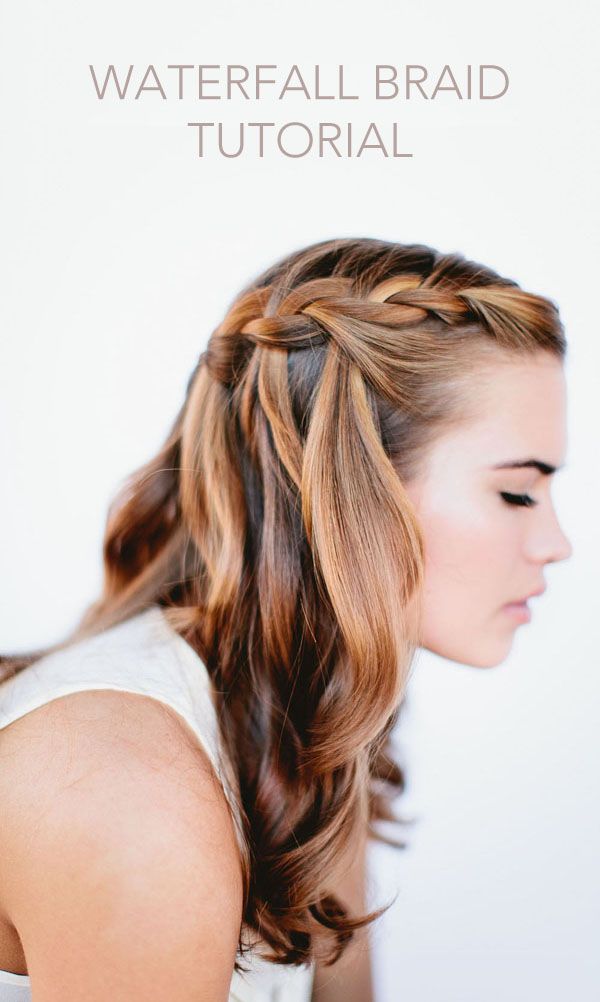
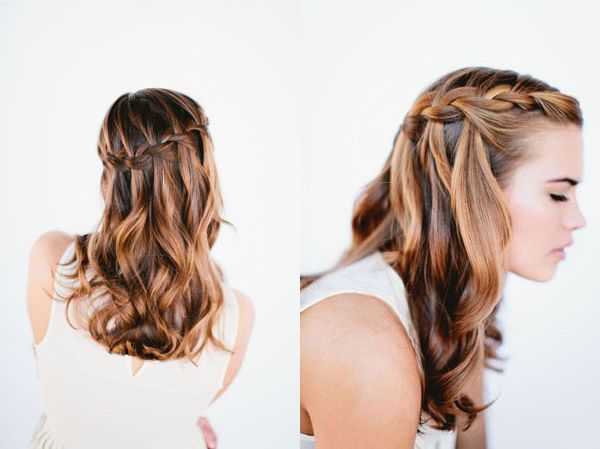
 photo 17-style2-11_zps4d49eb31.jpg


4) Waterfall Braid


This Waterfall Braid is so pretty and perfect in every way!

http://www.oncewed.com/67431/wedding-blog/diy-wedding/waterfall-braid-wedding-hairstyles-for-long-hair/

 photo diy-waterfall-braid-tutorial_zps53194098.jpg photo waterfall-braid-wedding-hairstyles-for-long-hair2_zps7a048594.jpg


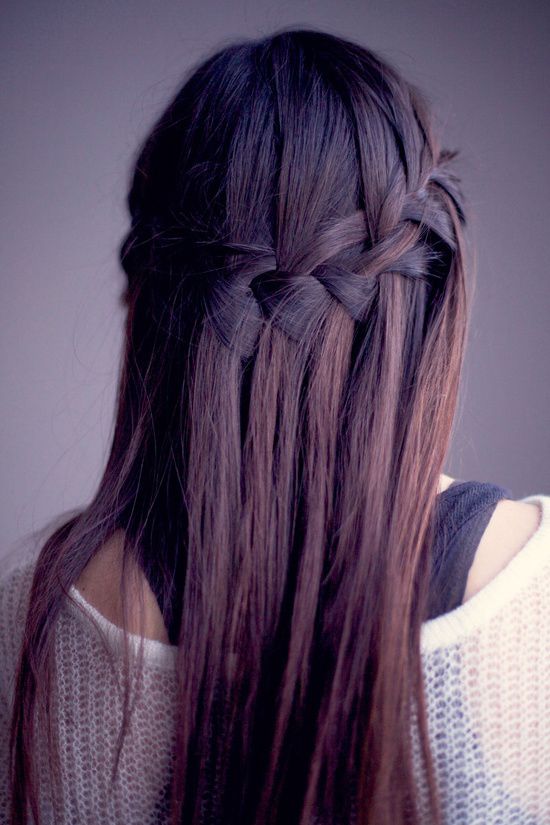
5) Waterfall Braid Video Tutorial 


This beautiful video from Boat People Boutique shows how to do the Waterfall braid almost similar like the tutorial above but a tiny wee bit different. I also found it really helpful to have a video supporting the photo tutorial above to get the Waterfall braid right!

http://blog.boatpeopleboutique.com/projects/diy-waterfall-braid
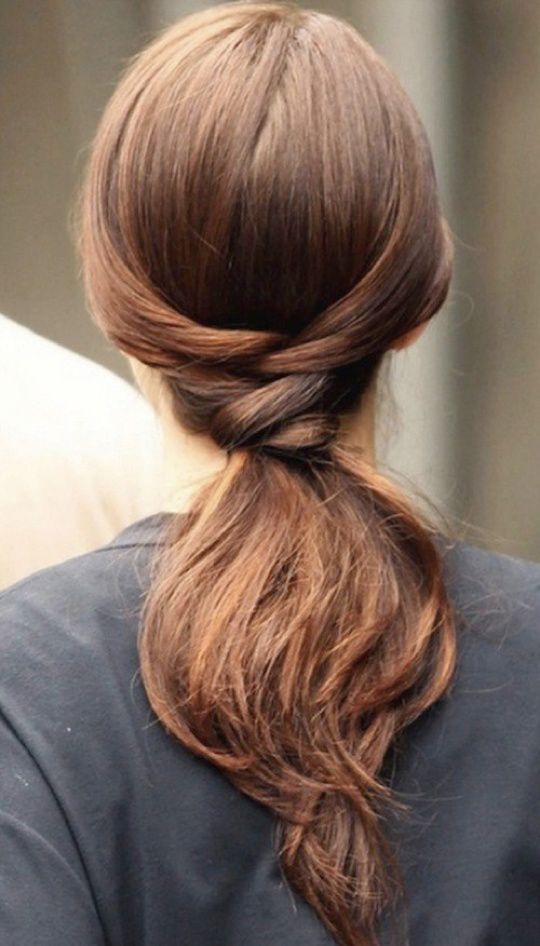
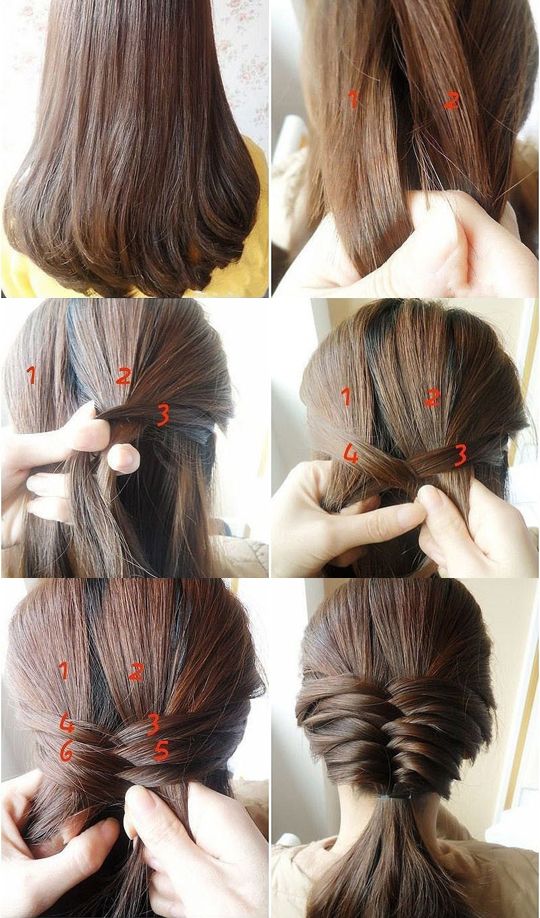
 photo b10800e9ba19d2d5cdccae730876e16e_zps594c1373.jpg


6) The Triple Braid

The Triple Braid is easy to do and kind of fakes that fat pulled apart sloppy fishtail or even a weaved hair and that's why I love it so much!

http://www.hairromance.com/2012/12/the-triple-braid-hairstyle-tutorial.html

 photo Hair-Romance-triple-braid-tutorial_zpscd32badb.jpg


7) Half done Fishtail Braid

One of my favorite fishtail hair-do's is the half done fishtail braid! And while I couldn't find the exact tutorial leading to this look the above knowledge plus the below tutorial should be enough to lead us right to it ;)

(no credits found)

 photo halffishtailbraid_zpsa1a2257f.jpg  photo halffishtailbraid-1_zpsd4ff9105.jpg

FOLLOW COCOROSA ON BLOGLOVIN' FACEBOOK AND TWITTER 
You have read this article favorite tutorials / fishtail braid / hair tutorials / triple braid / tutorial / waterfall braid with the title tutorial. You can bookmark this page URL http://mytattoossy.blogspot.com/2013/04/favorite-fishtail-and-waterfall-braid.html. Thanks!

DIY Baroque Baseball Cap (+ Tutorial)

Photobucket


I was asked by my friends over at Miista to brew up another DIY! They really loved the DIY baroque tights and loved to see how I would apply the same idea to another item, uhm yes, one that didn't take 16 hours to make haha. So I went for a Baseball Cap. The Baseball Cap ended up being a far easier DIY, I think I finished it within a hour! I did take another approach making it so I made a separate tutorial. I loved that the cap came out having a bit of that 90s flavor! I have been wearing it non-stop ;)
xoxo

CLICK HERE for the DIY Baroque Baseball Cap Tutorial


Photobucket Photobucket


FOLLOW COCOROSA ON BLOGLOVIN' FACEBOOK AND TWITTER
You have read this article Baseball Cap / DIY / DIY Baroque / miista / tutorial with the title tutorial. You can bookmark this page URL http://mytattoossy.blogspot.com/2012/12/diy-baroque-baseball-cap-tutorial.html. Thanks!

DIY Baroque Tights Tutorial

PhotobucketPhotobucket
photo's me and D&G fall winter 2012/2013

As Promised! The Tutorial for the DIY Baroque Tights! 
Hope you like it!
xoxo

You can totally apply this DIY to other items as well!


1) What You Need

1) Tights, I used H&M tights of about 60 denier!
2) Needle, Thread (metallic Thread, Gold or gold colored is preferred), pins, scissors, scotch tape
3) Baroque (cornelli) Motifs, these are mostly Iron-On's although sewing is better for a more beautiful look.

I used 2 kinds of Cornelli Motifs from Barnett Lawson Trimmings in London, both Gold colored, online here and here.

* If preferred, instead of sewing you would need an Iron or Glue (Pattex Glue or Fabric Glue only when making the Motifs yourself since the Cornelli Motifs are Iron On and thus the glue side is platic-like instead of fabric!) You can make Motifs yourself by Spray Painting (gold) felt fabric.


Photobucket


2) Placement Practice

Before we even begin it's very important you understand how the Baroque Motifs and Prints work! 
Look closely at my finished tights and to the D&G collection and you will see the placement is symmetric, kind of mirror reflecting! The Cornelli Trimmings I bought (seen below) at Barnett Lawson come in a set so if you decide to make your own trimmings make sure you have a left and right version as well!

Photobucket


Now start playing a bit with all the possible Motifs/Prints you can make to get a good feel of the trend and don't be afraid to look at existing prints! Make sure you work in a symmetrical way, always mirror reflecting the left and right side!

Photobucket

Photobucket


3) Wear the Tights

Ready with the Practice? Wear the tights or if you prefer this DIY on a Tee or Skirt, wear those items so we can have a look of where exactly we want to place the Motifs!

Photobucket


4) Placement

Stay very close to a mirror so you can see what you do! Place the Motifs on the tights how you like it, play a bit with the placements you have practiced and work symmetrical!

Photobucket


5) Pinning

Loosely Pin the Motifs the way you like it! I worked on 1 leg first ( my Right Leg) since I will mirror reflect the Motifs later on on the other leg! Keep looking in the mirror to make sure everything looks good and change things while you still can! I like to do this while I wear the tights since its the best way to see how the outcome will be! I guess with T-Shirts or Skirts you can work on the items while not wearing them.

Photobucket


6) Attaching the Motifs

Although the Motifs are Iron On I really prefer sewing for a more beautiful look but it's really up to you what you want to do! I think Ironing will be as painstaking as sewing and glueing will prob be a hazard too since you would have to be careful not glue the front and back legs to one another ;)

I worked on 1 leg, my right leg, completely finishing one leg first before I reflect the same on the other leg!

Photobucket
Photobucket
 
7) Repeat the Process on the other Leg!

All done with one leg? and still alive? Repeat the entire process on the other leg by looking in the mirror when placing and pinning the Motifs for a perfect mirror reflected look (symmetry example here)!

Photobucket


8) Your Ready!!

jayyyyy
xoxo

Photobucket Photobucket

FOLLOW COCOROSA ON BLOGLOVIN' FACEBOOK AND TWITTER
You have read this article Barnett Lawson Trimmings / Cornelli Motifs / DG / DIY Baroque / DIY Baroque Tights / DIY tights / DIY tutorials / tutorial with the title tutorial. You can bookmark this page URL http://mytattoossy.blogspot.com/2012/12/diy-baroque-tights-tutorial.html. Thanks!

Alice Point + COCOROSA DIY Beanie's (+ tutorial)

Photobucket


Me and Alice combined forces last week in London for a fun little project, we were asked by MIISTA to brew up a DIY for the MIISTA blog (one that wouldn't take a million hours and bleeding fingers) and how could we say no? Especially since no bleeding fingers would be involved and we just love to Brew, although no brewing was involved either! We really wanted to pimp up our so necessary Winter Wear, Beanie obsession, anyone else?

Do check out THE FULL TUTORIAL and video on MIISTA.com! and do check out my partner in crime Alice Point!
xoxo

ps. No COCOROSAS and ALICE POINTS where hurt during the making of this tutorial. All added swag should be handled properly. ALICE POINT went on to live happily ever after, marrying a whole varsity team. COCOROSA eventually got the carpet (this Carpet) to fly.

Photobucket Photobucket

FOLLOW COCOROSA ON BLOGLOVIN' FACEBOOK AND TWITTER
You have read this article Alice Point / beanie / DIY / DIY Beanie / Do It Yourself / miista / tutorial with the title tutorial. You can bookmark this page URL http://mytattoossy.blogspot.com/2012/11/alice-point-cocorosa-diy-beanie-tutorial.html. Thanks!